Alan Adler spent 40 years designing aerodynamic objects — he’s the engineer behind the Aerobie flying ring, which set a world distance record for thrown objects in 1984. In 2005, he turned his attention to coffee and produced the AeroPress: a plastic tube, a plunger, and a paper filter. It looks like it belongs in a chemistry lab. It makes an outstanding cup of coffee.
The World AeroPress Championship, started in 2008, now draws competitors from over 60 countries each year. They all use the same device. What varies is technique — and technique matters more with the AeroPress than with almost any other brewing method.
For kopi luwak, the AeroPress is particularly suited. Here’s why, and how to use it properly.
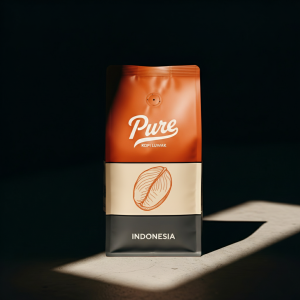
Pure Kopi Luwak
Wild-sourced. Organic. Arabica. From $109.
Why AeroPress Works Well For Kopi Luwak
The AeroPress applies gentle pressure during extraction — roughly 0.35 to 0.75 bar, produced by hand rather than a pump. This is far less than espresso (8–9 bar) but more than any gravity method. The effect on kopi luwak specifically: the pressure accelerates extraction of the complex sugars and oils without over-extracting the bitter compounds that remain in the bean.
Kopi luwak’s enzymatic processing has already reduced certain bitter polyphenols. The AeroPress’s short contact time (1–3 minutes versus 8–10 minutes in a French press) means you’re not giving any residual bitter compounds time to fully extract. The result is a concentrated, full-bodied cup that manages to be both rich and clean — not qualities that usually coexist.
The AeroPress also produces a lower-acid cup than most hot brewing methods. The combination of shorter contact time and lower temperature options means less extraction of chlorogenic acids — the compounds most associated with stomach irritation. If you’ve found regular specialty coffee occasionally rough on your stomach, kopi luwak via AeroPress is one of the gentler options available.
Method 1: The Standard (Upright) Approach
Use 15–18g of medium-fine ground kopi luwak. Fine table salt consistency — slightly finer than pour over, not quite espresso-fine.
Rinse the paper filter in the cap with hot water, then attach to the AeroPress. Set the AeroPress on your cup. Add coffee grounds. Pour 200–220ml of water at 90–93°C (194–200°F). This slightly lower temperature than pour over is intentional — the pressure compensates, and lower temperature extracts less acidity.
Stir gently for 10 seconds. Place the plunger on top but don’t push yet — let it rest for 60–90 seconds total steep time. Then press slowly and steadily over 20–30 seconds. Stop pressing before you hear the hiss of air — that last bit of pressure produces harsh, over-extracted liquid.
What you get: a 60–80ml concentrate. You can drink it as-is (it sits somewhere between a lungo and a short americano), or dilute with 100–120ml of hot water for a full cup.
Method 2: The Inverted Approach
The inverted method gives you more control over steep time and prevents the liquid from draining prematurely during brewing. World AeroPress Championship competitors overwhelmingly use inverted or its variations.
Push the plunger into the chamber about 1cm from the bottom, then flip the AeroPress upside down so it stands on the plunger. Add 15–17g of coffee ground slightly coarser than Method 1. Pour 200–230ml of water at 75–80°C (167–176°F). Yes, significantly lower temperature — this is the secret to the inverted method’s smoothness.
At lower temperatures, the extraction of harsh acids and bitter compounds slows more than the extraction of the good stuff. You get the complex sugars, the body, the aroma — with less of the sharp edges. For kopi luwak, which already has a smooth compound profile from enzymatic processing, this produces a genuinely exceptional cup.
Steep for 90–120 seconds, stirring once at the 60-second mark. Then place the rinsed filter and cap on top, hold the cup against the cap, flip the whole assembly right-side-up, and press over 30 seconds. Dilute if needed.
Grind And Freshness Notes
The AeroPress is more forgiving of grind inconsistency than pour over — the pressure compensates for some variation. That said, with kopi luwak, you want to use a burr grinder and grind fresh. Kopi luwak ground within the last 30 minutes tastes markedly different from pre-ground coffee that’s been sitting for days. The complex volatile aromatics — the ones that give it the characteristic caramel and dried-fruit notes — dissipate quickly after grinding.
If you’re buying pre-ground kopi luwak and wondering why it doesn’t taste as described, that’s likely the reason.
Comparing Methods
AeroPress sits between pour over and French press on the body spectrum — more body than a pour over, cleaner than a French press because of the paper filter. For a colder, longer approach, kopi luwak cold brew extracts entirely differently — worth doing as a comparison to understand how much brewing method shapes the cup from the same bean.
For espresso-style concentration, AeroPress Method 1 with a finer grind and less dilution gets close. It won’t replicate the crema of a proper espresso machine, but the flavor concentration is comparable. Add steamed milk and you’ve got a respectable latte-style drink from a device that costs less than $40 and fits in your luggage.
The Bean You Start With
The AeroPress’s versatility means you can compensate for a lot of variables. What you can’t compensate for is a mediocre bean.
Wild-sourced kopi luwak from Java, roasted to order — the AeroPress will do it justice. The combination of the bean’s naturally modified compound profile and the AeroPress’s pressure-assisted, controllable extraction is one of the cleaner ways to experience what makes this coffee genuinely different from everything else on the shelf.
Adler designed the AeroPress to make better coffee faster. Kopi luwak was designed by geology, ecology, and about 24 hours inside a civet’s digestive system. Put the two together and the results are consistently better than either variable alone would suggest.
Pure Kopi Luwak
Wild-sourced. Organic. Arabica. From $109.